Learning how to write a blog post — every damn week — is hard. It’s tough to stay consistent, even for experienced bloggers.
That’s why I’m sharing this step-by-step guide that will transform your content marketing.
When I was starting a blog, I didn’t think I could write. I struggled with every aspect of writing — procrastination, spelling, grammar, and focus. I needed a system.
Pamela Wilson’s Master Content Marketing changed everything for me. In fact, this book made my list of my top business books.
I learned how to publish articles on a regular basis, and dramatically increased my website traffic.
Pamela recently shared her brilliant four-day content creation system on the podcast. This guide is a product of that conversation.
Read on to learn how to write a good blog post in less time (and with less stress) than you ever imagined.
Blog post template: The 7 essential pieces
Before we get into how you can write a blog post faster, let’s cover the basics:
What is a blog post? More importantly, what makes a good one?
For a blog post to be functional, it must cover the basic necessities:
- For you: To communicate your ideas.
- For readers: To understand what you are talking about.
These are both easier said than done. Especially if you are doing everything on your own.
It’s much easier when you understand the component parts of a good blog post. These factors work together to attract readers and keep them interested right through to the end of your post.
You can use the seven parts as a framework to build a compelling article, every time.
Even better, using a template eliminates blank page anxiety.
Here are the seven parts of an effective blog post to use a template every time you start a new article:
1. A strong headline
It doesn’t matter how great your content is if nobody clicks on the headline.
A strong headline will attract readers to your article. Think of it as a little piece of advertising for your content.
Take your time to come up with a compelling headline — one that grabs attention while telling readers what the article is about.
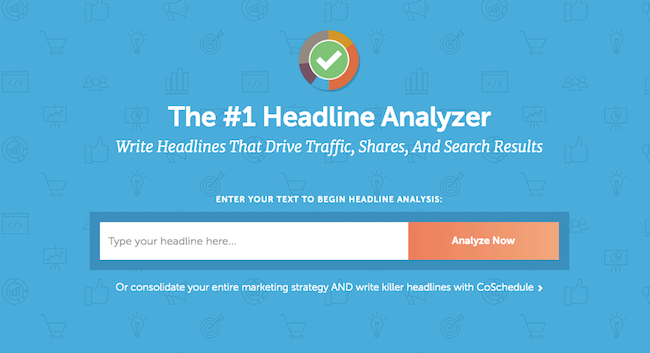
Blog post headline writing tips
Write down as many ideas as you can — at least 20. The first ones you write will be bad, cliche, recycled ideas. Get them out of your system, and you will get to some unique, clickable ideas.
Look at other blogs in other markets. See which headlines grab your attention and adapt them to your topic.
Try this headline analyzer from Co-Schedule.
2. The first sentence
Pamela’s book has an entire chapter dedicated to opening sentences — that’s how crucial this bit of writing is.
Imagine someone just clicked on your article. They haven’t decided whether it’s worth reading or not. They are hovering over the back button, and you only have a second or two to pull them down the page.
The first sentence should be short, but compelling, so readers continue on to the main body of your article.
Here’s an example from the Big Brand System blog:

3. Introduction
The opening sentence is part of an introduction section of the blog post.
This introduction should be a quick, general overview of what readers will learn in the rest of the article. It should get readers excited to keep going. Like a movie trailer, it provides the main highlights and makes them want to see the feature.
Keep it short, in the range of five to ten sentences. Readers are there to learn what you promised in the headline. You risk losing attention if you go on too long in the introduction.
4. Subheadings
Subheadings are like miniature headlines inserted throughout the article. They are essential to SEO content writing for a couple of reasons:
- Help you organize your ideas before you write
- Visually break up the content, making it easier to digest
- Make articles easy to skim, as people tend to do online
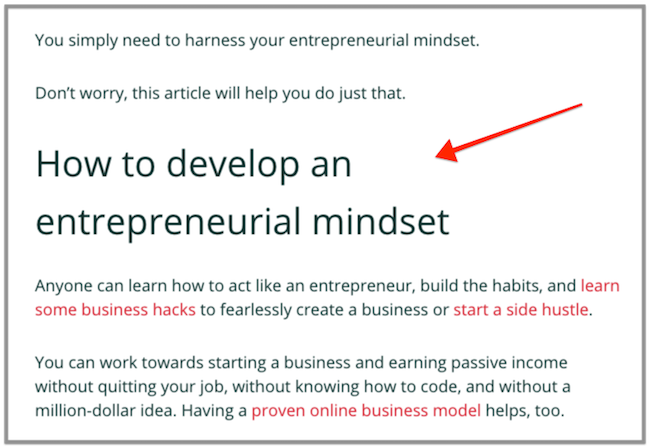
Here’s what subheadings look like on the page, from the first section of an entrepreneurial mindset article:
These days, everyone is content-rich and time-poor. Readers skim through articles and only read the subheads before they decide to spend time reading.
That’s why compelling subheadings are so important. If they are boring, vague, or non-existent, you will lose people before they even start reading.
5. Main copy
All the writing that fits underneath the subheadings is the main body of your blog post.
Because online content is read more often when it’s broken into lots of sections, keep each section short. Aim for three to five paragraphs.
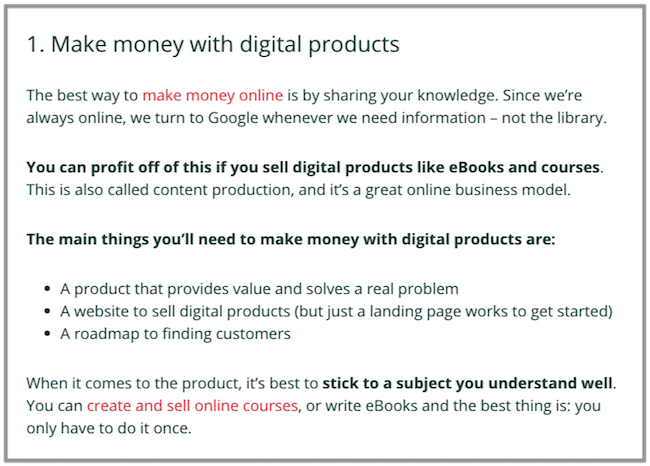
Within the main copy, do everything you can to make it easier to read. In this section of my post about online business models I used bullet points and bold text:
If you have to go on longer than five paragraphs, break your sections down further into subsections.
6. Summary
After the main text of your article, summarize what you’ve talked about.
Like the last few miles of a road trip, a summary is a time to talk about all the ground you covered. It only needs to be a few sentences to cover the highlights.
It’s also a good time to remind people what they learned, especially for longer articles. Psychotactics does a great job of summarizing this post, without sounding repetitive:
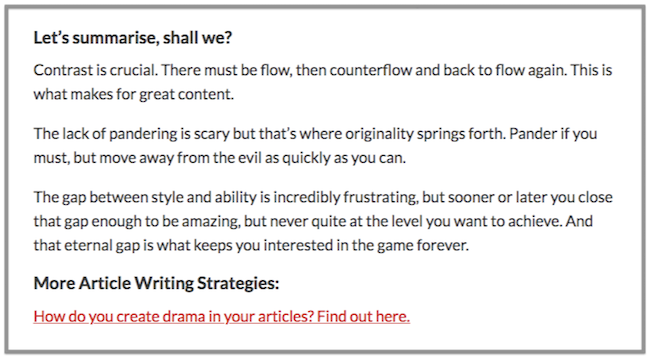
Think of the summary like congratulating your readers for getting to the end, and letting them know it was time well spent.
7. Call to action
This is content marketing. You want it to do something for your business, right?
The CTA (call to action) is an opportunity for you to tell readers what you want them to do next. Whether it’s to sign up for something, become part of your customer base, or join your audience, ask readers to take action.
It’s not always about making a purchase — think of it as a continuum. It can be gentle encouragement all the way up to a full-blown sales pitch.
Here are some ideas:
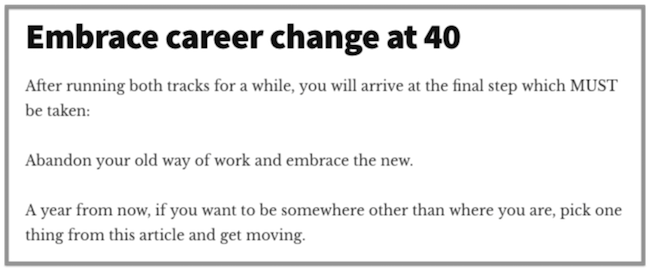
Encouragement to implement
A simple word of encouragement to take action on changing careers at 40:
Leave a comment

Sign up to receive a lead magnet

Read another piece of content
Like this example from Wait But Why, suggest some further reading on the subject:
Using a framework can seem restrictive — but constraints help in creative endeavors. Restrictions enable you to be completely free within defined parameters.
With blog posts, you’re already working with a natural constraint — the attention span of readers. With a structure to follow, not only is it easier to write good blog posts, but it’s easier for readers to consume.
Master Content Marketing is an incredible resource for those new to writing for online business. I can’t recommend it enough.
If you want to improve your writing, grab it and keep it on your desk every time you start a new blog post.
Now that you understand what makes a good blog post, you’re ready to start publishing.
How to blog consistently: The 4-day content creation system
One of the biggest challenges people face in blogging is staying consistent.
It’s easy in the beginning when you’re full of enthusiasm, tapping away at your keyboard. But when time is short and inspiration is non-existent, grinding out a blog post is the first casualty.
Pamela has created a “lazy” method for writing a blog post. It works like magic to keep your publishing schedule on track.
Her system spreads the work over several days, so it never consumes your entire week. It breaks the project into manageable pieces, so it’s easier to start, and actually finish.
Best of all, this system ensures your blog posts are remarkable because:
- You will look at your article more than once, with fresh eyes.
- You’ll have time to edit and polish your writing.
Pamela’s latest book, Master Content Strategy, is a complete guide to content marketing — including choosing topics, promoting content, and planning.
The four-day content creation system is a part of the book and the topic of our recent interview.
As you read the four stages below, keep in mind these assumptions:
- The starting point: You’ve already chosen the topic, and done your research (Master Content Strategy is a big help with this).
- Spread the days out how you want: You don’t have to do four days in a row. The important thing is to take a break after each stage, and come back with fresh eyes.
Day 1: Create a backbone for your blog article
Do you remember learning to write an outline back in grade school?
That’s essentially what you are going to do on day one. You are going to build a structure that will hold the shape of your article, like a backbone.
The difference is you are not writing a school paper — you are learning how to write a good blog post. The backbone of your blog post consists of:
1. A compelling headline
Do some brainstorming to come up with lots of headline ideas. Remember, it takes some digging to get past the junk — the unoriginal, bland, and boring.
At this point, you have to settle on a compelling headline idea. This won’t necessarily be the final version since you have plenty of time to tweak it before you publish.
For now, choose your best headline candidate, and move on to build the rest of the backbone.
2. Subheadings
Now is the time to organize your thoughts about the topic:
- Write down the main points you want to make, in point form.
- Arrange your points in a logical sequence.
You should have at least three to five subheads, and more for longer articles.
Break the information down as much as possible — create subsections under the subheadings where it makes sense.
Depending on your blog format, the subheadings could be:
- List posts: Numbered list items
- Outlining a process: Action steps
- In-depth guide: Various aspects of the topic
When you’ve got the basic structure down, pay attention to the wording of your subheads. Remember that subheadings function as mini-headlines. When done right, they create interest and draw readers further into your article.
And that’s it! All you have to do on the first day is write a headline and subheadings.
Now as you walk away, you will be thinking about your content. The framework is there, and the ideas will start popping up, as you go about the rest of your day – or hell, use this spare time to start your side hustle.
Blog writing tips: Use the same tools every time you write
Certain tools, besides paper and pen, are helpful in building the backbone of a blog article.
It doesn’t matter which tool you use, as long it’s one that helps your ideas flow most easily.
For example, Jonny uses sticky notes for all the subheadings and subsections. Then it’s easy to move them around as he works out the best sequence.

Pamela uses mindmaps to plan content. Subheadings are branches of the map that are easy to move around into any order.

Using the same set of tools each time you start a blog post cues your brain to switch into content-creation mode.
So, once you find the tools you like best, keep using them, every time you write.
Day 2: Write the first draft
Start with an extra cup of coffee — this is a big writing day.
Since you are starting with the headline and subheadings, all you have to do is go through and fill in the sections:
- First sentence
- Introduction
- Copy under each subheading
- Summary
- Call to action
Here’s the most important thing to remember when writing the first draft:
Write forward, not backward.
Don’t go backward to edit anything. By the end of day two, all you need to be is done. Just get the thoughts out of your head, in position, and ready for editing the next day.
The first draft will be messy. Think of it as a ball of clay that you will come back to mold and finish the next time you work on it.
Writing the first draft is the hardest day for most people. When you’re done, walk away and take a well-deserved break.
Blog writing tips: Write out of order and use a timer
What happens when you sit down with your article backbone, your coffee, and… crickets. You have no idea what to write for the first sentence.
Every second you sit there looking at the blank space, you increase the chances that you’ll give up before you even start writing.
Give yourself a quick win. Skip ahead to any section you want.
You have permission to write the sections in any order you please. That’s the beauty of a framework — you can hop around until all the sections are filled in.
The other challenge on day two is staying focussed. It takes a long time to write a draft, especially if you give in to distractions.
Try setting a timer, to give yourself a time constraint.
A time limit will push you to race towards the finish line and avoid temptations (like stopping to edit, making a sandwich, or researching writers-for-hire).
Day 3: Editing and formatting your post
As an editor, you are looking at the work from the reader’s perspective. You have to switch from writing mode, into editing mode.
That’s why it’s so important to break writing and editing into separate sessions. If you have to do them both on the same day, take a break in between.
As you arrive back at your blog post with fresh eyes, it’s time to edit.
Read through the article. Make it look inviting. Do everything you can to make it easier to skim through and read online:
- Simplify: Eliminate extra words and long sentences.
- Break up paragraphs: Whenever the idea turns a corner, hit return.
- Bullet lists: Consecutive information is easier to read in a bullet list. For example, “Do this, this, and this,” can be converted to a bullet list.
- Block quotes: Choose sentences to emphasize with block quotes. This helps break up the text and make it more skimmable.
This is also the time to add images wherever you can in your blog post. At the very least, create an image for the top of your post, and one for each major section.
Images add to the visual appeal of your blog and help convey your message more effectively. Images are processed in a different part of the brain than words — a less busy part.
Here’s a fantastic resource on visual marketing to help you get started.
By the end of day three, your blog post is ready to publish:
- Reads smoothly
- Formatted for readability
- Grammar and spelling checked
- Images in place
In print design, where Pamela began her career, mistakes are costly. Reprinting 25,000 copies due to mistakes is a huge expense.
Online, it’s easy (and free) to make changes after you publish.
Of course, you want to make sure you publish high caliber blog posts. But let’s face the facts:
You are going to make mistakes. Don’t let perfectionism stop you from publishing.
Anyone who writes online will eventually get emails and comments pointing out mistakes. There’s no need to be mortified. More often than not, readers are trying to be helpful, not critical.
When it happens, just say thanks. And fix the mistake — it’s usually pretty easy.
If something has a mistake, people know it wasn’t written by artificial intelligence, it was written by a human.
Blog writing tips: Grammar and spelling tools
Most bloggers don’t have an editor. Starting a business usually means doing everything yourself for the first while.
That means it’s on you to make sure your writing is clear, concise, and correct. Investing in the right tools makes editing much easier.
Grammarly is a lifesaver, especially if you are not a confident writer.
You can sign up for Grammarly here.
Grammarly not only corrects errors in spelling and grammar but strengthens your writing — it identifies repetitive words and weak phrases.
Day 4: Publishing and promoting your blog post
On day four, it’s time to put on your marketing hat. Your job is to become an advocate for the article you’ve worked so hard to put together.
On the first day of publishing, you need to get the blog post in front of as many people as possible. This is a critical time for attracting attention, and it will help your SEO rankings. (You can also help your SEO by using a dedicated software service. Check out our SEMrush review for more information about what these programs can do.)
Think about what people do when they have a baby. They call everyone to share the news:
“There’s a new baby, her name is Susie, she weighs 8 lbs, and we’re really excited!”
This is what you are doing when you promote your post — letting everyone know you have a new resource for them. You’re excited about it, and you think they will be too.
1. Promote your blog post on social media
Start with social media platforms where you are active. You don’t need to be on every single platform, just one or two that you focus on.

Talk about your new post three or four times the first day.
This may sound excessive, but it’s not. At any given moment, a different group of people is scrolling through their feed.
Each day mention it again.
Write different posts, but don’t be afraid to repeat your message. You have a fantastic piece of content that you’ve worked hard to bring to life.
2. Notify your email subscribers
Send an email blast to your list, with a link to your new blog post.
All you need to include is a quick note, inviting them to come and check out the new resource you’ve created — just for them.
You can even include the opening bit of your article as a teaser to get them interested in reading.
3. Reach out to a wider network
Every once in a while you have an epic piece of content you are extra proud of. Reach out to colleagues with these ones — anyone you think might find your post useful.
Ask people to share it with their audiences. Make it as easy as possible for them, by offering to pre-write posts.
Even if they don’t have an audience, they could be a surprising source of new readers. For example, they might include you in a company newsletter, or share with their team at work.
Whenever you include thought leaders in an article, let them know.
Other writers are likely to share your stuff when you quote them. Find a way to get in touch and let them know you’ve shared their wisdom in your new blog post:
- Send them an email
- Tag them on social media
- Submit a contact form on their website
You don’t have to ask for anything — just give them a heads up. If they like the article, they will share it.
For example, Pamela sends a weekly newsletter of curated content to her subscribers. Whenever she’s included in an article, it goes straight into the newsletter where her entire email list will see it.
This is a good reason to quote (and include links) people you admire.
Blog writing tips: Never abandon your post after you hit publish
The biggest mistake you can make in blogging is to believe, “I’m done when I hit publish.” Learning how to write a blog post effectively is about more than just learning how to write.
If you want people to read your blog posts, promotion is absolutely essential.
It’s hard to promote your work. Many people struggle with feeling self-conscious and self-promotional. It’s not easy to change your thinking — you have to do it anyway.
Of course, talking about your blog benefits you. But the primary aim of content marketing is to benefit readers with valuable resources. You can’t do that if they don’t see your posts.
Start small and you will get used to the process.
How to write a blog post: The only post that counts
Within the first year of starting a blog, the most important thing is to publish lots of content. The more blog posts you publish, the more information is available:
- For search engines to help readers find your site.
- For readers to understand what your site is about.
- For you to learn what type of content your audience likes best.
In Master Content Strategy, Pamela encourages you to publish every week during the first year.
And the only blog post that counts is the one that’s actually published.
Now you have everything you need to publish on schedule, every time — a structure to follow and a streamlined process for how to write a blog post.
Contrary to what you might think, blogging is still super profitable.
If you are ready to get started with blogging, we recommend one course exclusively — that’s Launch Your Blog Biz and it was created by Alex and Lauren at Create and Go.
Blogging took Alex and Lauren from young professionals living every second for the weekend to making over $100,000 per month and traveling the world in our twenties!
And with Launch Your Blog Biz, they teach you the step-by-step solution for taking your blog from $0 to $1,000/month with free traffic and affiliate marketing.
Jonny, you didn’t miss any details in this one. awesome stuff.